So, guys today I am going to show you how to connect custom domain with Blogger.Now, we directly move to start our tutorial.....
How to connect custom domain to blogger?
We need to follow below steps to add a custom domain in Blogger...
Step 1: Buying custom Domain online.
Step 2: Setting up DNS in domain manager website.
Step 3: Adding google's IP to DNS manager.
Step 4: Saving and checking is Domain connected Successfully.
Some FAQ.....
What is Custom Domain?
When we have made our blog on blogger by google we get a default web address with subdomain "example.blogspot.com" This domain feels not to be professional and feels like noting is valuable in such blog with such a web address. To make our blog professional looking we use a custom domain which is the domain of our choice, for eg. example.net,example.com,example.in and many more...
How to Buy a custom Domain?
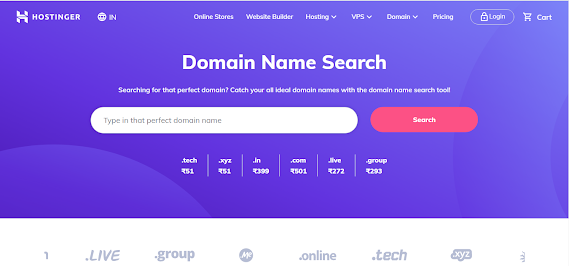
You have to buy a custom domain in order to connect custom domain with your blogger. For buying custom you can use Hostinger's service , they provide very good service for buying Domain at a cheap prices......
You can check for your Domain here
Here, you have to type and search for your desired Domain...
Then look for your desired domain in results....
After selecting your domain click on "Add to cart" Button for your domain.
Then you will be redirected to checkout page. So, pay for your domain and get your domain registered.
Once you bought your domain you will be sent a mail to confirm your contact details for WHOIS database. So, click on the link and add your Information for WHOIS database.
After this you have successfully registered your Domain and now we can move to our further steps:
How to add details for blogger in Hostinger DNS manager?
Go to your blogger and open your blog on which you want to add Custom domain and then go to setting for your blog. Here after scrolling down you can find Publishing Settings.
Click on custom domain and you will be shown a custom dialog as shown in image below....
Enter the domain address you bought in Hostinger and click on save (ensure to use www. ) and then you will be shown another dialog box asking you to verify your ownership.Here, you have to add two Cname Given.The two cname are seen as following for your blog,
You will find your Cnames in the highlighted area in above image.Now you have to open hostinger's hpanel and look for your domain and click on manage DNS for your domain. Now delete all the records and set up two new Cname records with the values given in your Dialog box in blogger. After you have added two Cname successfully, you have to add 4 A(@) records to your DNS management which point to following IP's:
- 1. 216.239.32.21
- 2. 216.239.34.21
- 3. 216.239.36.21
- 4. 216.239.38.21
When you added these IP's and the previous Cname you have completed you Work.Now it will take some time get your website live.Till then take one Ride on your bike and get some fresh air.When you come back you will find your website live.
So, you have added custom domain your blog Successfully and set your blog live.
This was our tutorial for "How to add Custom Domain to your Blogger blog" and we end our tutorial here. We will be back tomorrow with a new fresh topic, till then......
Happy Koding......


Comments
Post a Comment